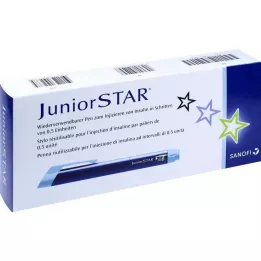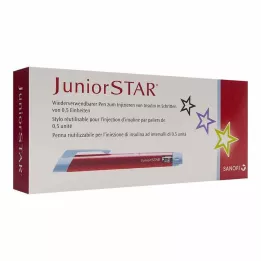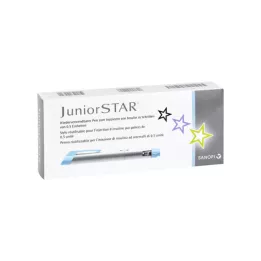
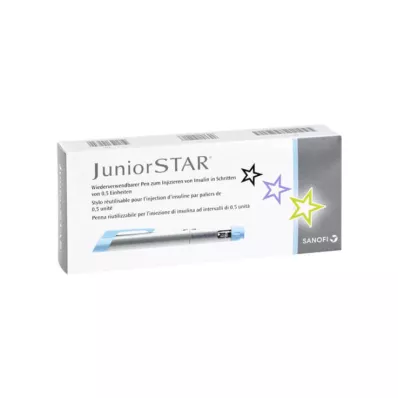
Juniorstar injection device silver, 1 pc
JUNIORSTAR Injektionsgerät silber
Manufacturers: Sanofi-Aventis Deutschland GmbH
PZN: 09937435
Content: 1 St
Reward Points: 933
Availability: In stock
$123.99
$115.33
from German pharmacies to your address
Instructions for use for Juniorstar injection device silver, 1 pc
JuniorSTAR injection device silver
The JuniorSTAR injection device is a reusable pen specifically designed for injecting insulin.It allows dosages to be set between 1 and 30 units in increments of 0.5 units.This device is intended for use only with certain types of insulin such as Lantus, Apidra, Insuman, Insulin lispro Sanofi and Insulin aspart Sanofi in 3ml insulin cartridges (300 units, U-100 insulin) from Sanofi-Aventis.An insulin cartridge contains enough insulin for multiple injections.
No prescription is required for this product.
To ensure accurate reading of the dose on the pen, hold the pen horizontally with the needle to the left and the dosing ring to the right.
Application
Before using the JuniorSTAR injection device, please read the complete operating instructions carefully.For the injection, you will need the JuniorSTAR reusable insulin pen, a 3 ml Sanofi-Aventis insulin cartridge (sold separately), and a pen needle (sold separately).To handle, follow steps 1 to 8.
Handling the JuniorSTAR injection device
Step 1: Insert a new insulin cartridge.
Step 2: Check your insulin.
Step 3: Attach the needle.
Step 4: Run a security test.
Step 5: Adjust the dose.
Step 6: Inject the insulin.
Step 7: Remove and discard the needle.
Step 8: Storing the JuniorSTAR.
Notes
Attach a new needle before each use and only use needles that are suitable for the JuniorSTAR.Carry out the safety test before each injection and always check the labeling on your insulin cartridge.Use a different colored pen for each insulin and never store the JuniorSTAR in the refrigerator.Never use the JuniorSTAR if it is damaged or if you are not sure that it is working properly.Always have an alternative to inject your insulin.
If you use different insulins, you should use a different colored pen for each insulin.The JuniorSTAR is available in different colors.This JuniorSTAR is for your personal use only.Do not share it with other diabetics.Never use the JuniorSTAR if it is damaged or if you are not sure that it is working properly.Never use a damaged insulin cartridge.Always have an alternative to inject your insulin.Do not insert a used insulin cartridge.
You cannot turn the dosing ring past the number of units left in the insulin cartridge.Do not try to force the dosing ring to continue turning.If there are not enough units left in the cartridge, you can either inject the units left in the cartridge and give the missing amount with a new cartridge, or use a new insulin cartridge for the entire dose.
Never store the JuniorSTAR in the refrigerator.
Product features
The JuniorSTAR insulin pen in silver comes with an instruction manual that you should read carefully before using it for the first time.The pen is reusable and allows dosages to be set between 1 and 30 units in 0.5 unit increments.It is only suitable for use with certain types of insulin such as Lantus, Apidra and Insuman in 3ml insulin cartridges (300 units, U-100 insulin) from Sanofi-Aventis.
Hold the pen exactly as shown in the instructions.To ensure accurate dose reading, hold the pen horizontally with the needle to the left and the dosing ring to the right.
Important information about using the JuniorSTAR
Attach a new needle before each use.Only use needles that are suitable for the JuniorSTAR.Perform the safety test before each injection.Always check the label on your insulin cartridge before use.If you use different insulins, you should use a different colored pen for each insulin.The JuniorSTAR is available in different colors.This JuniorSTAR is for your personal use only.Do not share it with other diabetics.Never use the JuniorSTAR if it is damaged or if you are not sure that it is working properly.Never use a damaged insulin cartridge.Always have an alternative to inject your insulin.Do not insert a used insulin cartridge.
You cannot turn the dose selector beyond the number of units remaining in the insulin cartridge.Do not force the dose selector to turn further.If there are not enough units left in the cartridge, you can either inject the remaining units and administer the rest of the dose using a new cartridge, or use a new insulin cartridge for the entire dose.Never store the JuniorSTAR in the refrigerator.
Handling the JuniorSTAR in special situations
When used in a multi-patient setting, such as hospitals or nursing homes, special precautions must be taken to ensure that the correct pen is assigned to each patient.If you are administering an injection to another person or receiving one from another person, exercise particular caution during the injection and needle removal to avoid accidental needle-stick injuries and the transmission of infectious diseases.
Step 1: Insert a new insulin cartridge
Remove the pen cap.Unscrew the cartridge holder from the pen body and remove the empty insulin cartridge, if present.Screw the threaded rod fully back to its starting position.Press the injection button all the way in if the dose window does not show "0".Hold the threaded rod ring firmly and turn the pen body counter-clockwise as far as it will go to screw the threaded rod all the way back.Do not touch the plunger at the tip of the threaded rod and do not attempt to push the threaded rod back.
Check the label on your insulin cartridge to ensure you are using the correct insulin.Refer to the information in the insulin cartridge package leaflet to check the expiry date and the appearance of your insulin.Insert the new insulin cartridge into the cartridge holder and ensure that the label on the insulin cartridge is visible through the window of the cartridge holder.Screw the cartridge holder firmly back onto the pen body.Make sure that the marks on the cartridge holder and the pen body are aligned with each other.
Step 2: Check your insulin
Check the label on your insulin cartridge before every injection.If the label on the insulin cartridge is not visible, rotate the cartridge with your fingers until you can see the label.Check the appearance of your insulin.If you are using a clear insulin solution, do not use the cartridge if the solution is cloudy or discoloured.If you are using an insulin suspension, tilt the pen up and down at least 10 times to mix the insulin.Check the appearance of your insulin after mixing.Insulin suspensions must be uniformly milky white.
Step 3: Attach the needle
Peel the protective seal off a new needle.Align the needle and the pen and keep them straight when attaching the needle.Screw or push the needle on, depending on the type of needle you are using.
Step 4: Perform a safety test
Set 2 units by turning the dose selector.Remove the outer needle cap and keep it to unscrew the needle from the pen after the injection.Remove the inner needle cap and dispose of it.Hold the pen with the needle pointing upwards and tap the cartridge holder so that any air bubbles rise towards the needle.Press the injection button all the way in and make sure that insulin appears at the needle tip.
Step 5: Set the dose
Make sure that the dose window shows "0" after the safety test.Set the desired dose.If you turn the dial too far, you can correct the set dose by turning the dose selector back.The arrow in the middle of the dose window indicates the set dose.Do not press the injection button while setting the dose, as insulin will be released.
Step 6: Inject the insulin
Inject your insulin as shown by your healthcare professional.Insert the needle into the skin.Inject the set dose by slowly pressing the injection button all the way in. Keep the injection button fully pressed and slowly count to 10 before withdrawing the needle from the skin.
Step 7: Remove and dispose of the needle
Remove the needle after each injection and store the JuniorSTAR without the needle attached. Place the outer needle cap on a flat surface and insert the needle into the outer needle cap.Put the outer needle protection cap back on.Squeeze the outer needle cap slightly to grab the needle and use it to twist the needle off the JuniorSTAR.Hold the pen firmly on the cartridge case.Discard the used needle in a puncture-proof container.
Step 8: Storing the JuniorSTAR
Place the pen cap back on the JuniorSTAR and store it until the next injection.The insulin cartridge is sufficient for several injections.Keep your JuniorSTAR with the insulin cartridge inserted for the next injection.Do not store the JuniorSTAR in the refrigerator.The insulin should also not be stored in the refrigerator after it has been inserted into the JuniorSTAR.
Care
Protect your JuniorSTAR from dust and dirt.You can wipe the outside of the JuniorSTAR with a cloth dampened with water.The pen must not be soaked, washed or oiled as this may damage it.The JuniorSTAR was designed to function accurately and safely.Treat him with care.Avoid situations where it could be damaged.If you are concerned that your JuniorSTAR may be damaged, use a new one.If you are unsure whether there is a malfunction, please contact your healthcare professional or call our team above.service number.A damaged JuniorSTAR may no longer be used for safety reasons.In an emergency, you can draw the insulin from the insulin cartridge using a suitable U-100 insulin syringe.
Storage instructions
Protect the JuniorSTAR from heat, direct sunlight and cold.Always store the JuniorSTAR without the needle and with the pen cap attached at a temperature of 5 °C to 30 °C.Do not put the JuniorSTAR in the refrigerator.Please read the insulin instructions for use for information on storing the JuniorSTAR with the insulin cartridge inserted.Keep your JuniorSTAR out of the reach of children.If you need a new insulin cartridge, take it out of the refrigerator 1 to 2 hours before the injection so that it can come to room temperature.Injecting cold insulin is more painful.After 2 years of use, dispose of your JuniorSTAR in accordance with local regulations.
Other
For Germany and Switzerland: After receiving your JuniorSTAR, please return the warranty card filled out and signed.The JuniorSTAR has a guarantee period of 2 years.If you have a complaint during the warranty period, please send the defective JuniorSTAR for replacement directly or via your pharmacy to the following address:
Germany: Sanofi-Aventis Deutschland GmbH, Complaints Service, Industriepark Höchst, Building K703, 65926 Frankfurt am Main.
Austria: sanofi-aventis GmbH, SATURN Tower, Leonard-Bernstein-Straße 10, A-1220 Vienna.
Switzerland: sanofi-aventis (suisse) sa, 3, route de Montfleury, 1214 Vernier/GE, Tel.: 0 800 87 0800 (free).
Please tell us the reason for the complaint.Pens sent to us will always be disposed of in accordance with legal regulations after examination.If insulin cartridges or needles that are not suitable for the JuniorSTAR are used, no liability is assumed for the safety, dosing accuracy and functionality of the pen or for any damage.Anyone who uses a technical aid such as this pen to deliver insulin must have insulin, syringes and needles on hand in the event of loss or malfunction.
Frequently asked questions
Question: No insulin comes out (when the injection button is pressed).Possible cause: After changing the insulin cartridge, the safety test may have to be repeated several times until insulin comes out.The threaded rod is not in the correct position for the rubber stopper of the insulin cartridge.There are air bubbles in the insulin cartridge.The needle is blocked or damaged.The cartridge case is not fully screwed to the case.Recommendation: Repeat the safety test until insulin comes out of the needle.Replace a clogged or damaged needle with a new one.Screw the cartridge case onto the housing until it stops.
Question: The injection button cannot be pushed in.Possible cause: The needle is blocked or damaged.The needle is not attached or is not attached tightly enough.You have not yet set a dose.You may not press the injection button straight.Recommendation: Turn the dosing ring back to "0".Insert a new, full insulin cartridge. Use a new needle.Perform the safety test before each injection.Attach the needle correctly.Set the desired dose by turning the dosing ring.Push the injection button straight in so that the dosing ring can rotate freely.
Question: The dose window does not show “0” after the injection.Possible cause: If the dose window after the injection shows a different number instead of "0", then the entire dose of insulin was not injected.Recommendation: Always press the injection button until the display is at “0”.If this is not possible, you may not have injected the full dose.Do not try to make up for the shortfall with a second injection (otherwise there is a risk of hypoglycemia).Please monitor your blood sugar and contact your healthcare professional.
Question: The insulin cartridge contains many air bubbles.Possible cause: The JuniorSTAR was stored with the needle attached.The insulin cartridge may be broken.Recommendation: Always store the JuniorSTAR without a needle.Perform the safety test until the large air bubbles are removed from the insulin cartridge.If there are still large air bubbles in the insulin cartridge, replace the insulin cartridge with a new one.Replace the insulin cartridge with a new one.
Question: The dosing ring cannot be turned.Possible cause: The insulin cartridge no longer contains enough insulin for your complete dose.Recommendation: ENTWEDER inject the existing units and administer the remaining amount with a new insulin cartridge ODER use a new insulin cartridge for the entire dose.
Question: The threaded rod cannot be turned back to the starting position when changing the insulin cartridge.Possible cause: The mechanism may be stuck because you tried to remove more units from the insulin cartridge than are available.Recommendation: Hold the threaded rod ring with one hand.Hold the dosing ring with your other hand.Turn the dosing ring counterclockwise to “0”;The blockage is released.
Question: The cartridge case cannot be screwed onto the housing.The rubber seal on the insulin cartridge is bulging.Possible cause: The threaded rod was not fully turned back to the original position before the cartridge case was attached.A dose is set and the injection button is pushed in without a needle attached, or the needle is blocked or not attached properly.Recommendation: Screw the threaded rod back into the housing correctly and then attach the cartridge case to the housing.If the rubber seal bulges, you may not be able to secure the needle properly.The rubber sealing washer can break.Please use a new insulin cartridge.
Manufacturer
Haselmeier GmbH, Vaihinger Straße 48, 70567 Stuttgart, Germany.
Distributor
Germany: Sanofi-Aventis Deutschland GmbH, 65926 Frankfurt am Main, Germany, Tel.: 0180 2 22 20 10 (0.06 EUR/call to German landline; mobile phone prices max. 0.42 EUR/min).Austria: sanofi-aventis GmbH, SATURN Tower, Leonard-Bernstein-Straße 10, A-1220 Vienna.Switzerland: sanofi-aventis (suisse) sa, 3, route de Montfleury, 1214 Vernier/GE, Tel.: 0 800 87 0800 (free).
Information as of December 2013.
Medicines Reviews
There are no reviews for this product.
Write a review
Popular in Insulin pen
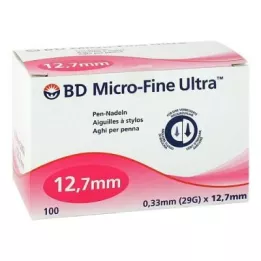
BD Micro-Fine Ultra Pen Needles 0.33 x 12.7 mm (100 pcs)
BD MICRO-FINE ULTRA Pen-Nadeln 0,33x12,7 mm
$38.73